wp:paragraph
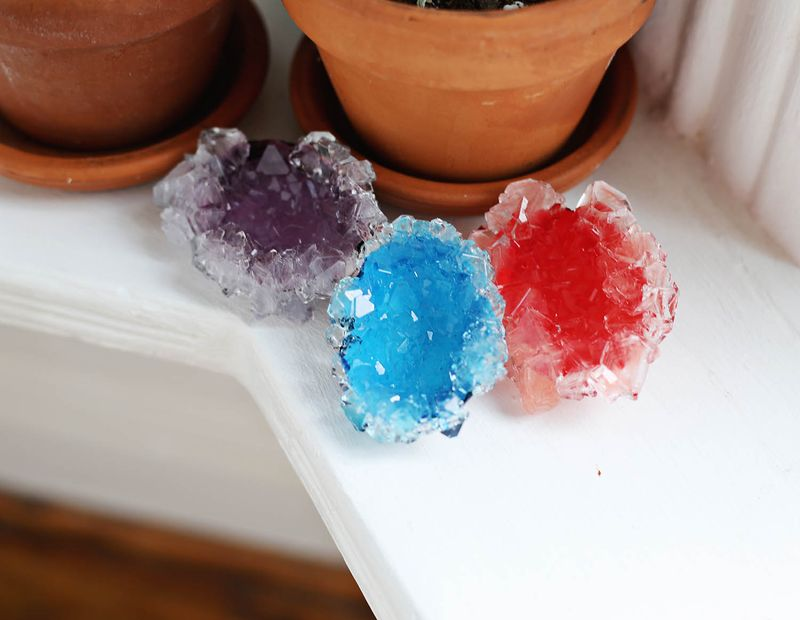
Growing your own crystals in 24 hours is one of the easiest ways to make chemistry feel exciting, visual, and real. Instead of only reading about molecules, solutions, and solids, you can actually watch sparkling crystals form on a pipe cleaner, string, or small shape inside a jar.
/wp:paragraph
wp:paragraph
This experiment is popular because it looks like magic, but it is completely based on science.
/wp:paragraph
wp:paragraph
When you dissolve a crystal-forming substance in hot water, the water can hold more dissolved material than it can hold when it is cool. As the solution cools, the extra dissolved material comes out of the water and attaches to a surface. Over time, tiny particles arrange themselves into repeating patterns. That is how crystals grow.
/wp:paragraph
wp:paragraph
The American Association of Chemistry Teachers explains a similar classroom crystal activity using borax and boiling water to create a supersaturated solution. In that activity, a pipe cleaner acts as a nucleation site where crystals can grow while the solution cools undisturbed overnight.
/wp:paragraph
wp:paragraph
In simple words, hot water helps dissolve more powder, cooling forces some of it back out, and the pipe cleaner gives the crystals a place to form.
/wp:paragraph
wp:paragraph
This is why crystal growing is a great beginner science experiment. It teaches solubility, saturation, supersaturation, cooling, crystallization, physical change, observation, and experimental variables — all with a result you can actually see.
/wp:paragraph
wp:paragraph
For more easy science content, you can also read 10 Science Facts That Sound Fake But Are 100% True and Make a Lava Lamp at Home Using Kitchen Supplies.
/wp:paragraph
wp:heading
Accuracy note
/wp:heading
wp:paragraph
This article explains a simple crystal-growing experiment for educational purposes. It is designed for students, parents, teachers, and curious readers who want a safe and clear STEM activity.
/wp:paragraph
wp:paragraph
This experiment commonly uses borax because borax crystals can form quickly and visibly, often overnight. However, borax is not food and should not be eaten, tasted, inhaled, or used without adult supervision. Poison Control advises following product instructions when using borates and seeking immediate medical attention if someone ingests a borate.
/wp:paragraph
wp:paragraph
Children should only do this experiment with adult supervision, especially because the method uses hot water.
/wp:paragraph
wp:heading
Quick Safety Notes Before You Start
/wp:heading
wp:paragraph
This experiment is simple, but it still needs basic safety.
/wp:paragraph
wp:paragraph
Use adult supervision.
/wp:paragraph
wp:paragraph
Do not eat or taste borax.
/wp:paragraph
wp:paragraph
Do not use jars, spoons, or containers again for food after using them with borax.
/wp:paragraph
wp:paragraph
Keep borax away from young children and pets.
/wp:paragraph
wp:paragraph
Be careful with hot or boiling water.
/wp:paragraph
wp:paragraph
Do not lean over the jar while mixing.
/wp:paragraph
wp:paragraph
Wash hands after the experiment.
/wp:paragraph
wp:paragraph
Throw away leftover solution safely according to local guidance and product instructions.
/wp:paragraph
wp:paragraph
If borax is swallowed or exposure causes concern, contact local poison control or a medical professional. Poison Control provides emergency guidance for possible poisoning exposures through its online tool and U.S. phone support.
/wp:paragraph
wp:heading
Key Facts About the Crystal Experiment
/wp:heading
wp:table
| Experiment Detail | Best Choice |
|---|---|
| Difficulty level | Easy |
| Best age group | Children with adult supervision, students, beginners |
| Main science topic | Supersaturated solutions and crystal growth |
| Time needed | 20–30 minutes setup, then 8–24 hours waiting |
| Best crystal material | Borax for fast visible crystals |
| Safer slower alternatives | Salt or sugar, but they may take longer than 24 hours |
| Best surface | Pipe cleaner, string, or rough object |
| Best result | Leave jar still and undisturbed overnight |
| Main safety concern | Hot water and borax handling |
/wp:table
wp:heading
Materials You Need
/wp:heading
wp:paragraph
For the best 24-hour result, use the borax version.
/wp:paragraph
wp:paragraph
You will need:
/wp:paragraph
wp:paragraph
1 glass jar or heat-safe container
/wp:paragraph
wp:paragraph
1 pencil, chopstick, or popsicle stick
/wp:paragraph
wp:paragraph
1 pipe cleaner
/wp:paragraph
wp:paragraph
String or thread
/wp:paragraph
wp:paragraph
Hot water
/wp:paragraph
wp:paragraph
Borax powder
/wp:paragraph
wp:paragraph
Spoon for stirring
/wp:paragraph
wp:paragraph
Food coloring, optional
/wp:paragraph
wp:paragraph
Paper towel or tray
/wp:paragraph
wp:paragraph
Adult supervision
/wp:paragraph
wp:paragraph
Optional materials:
/wp:paragraph
wp:paragraph
Magnifying glass
/wp:paragraph
wp:paragraph
Notebook for observations
/wp:paragraph
wp:paragraph
Ruler for measuring crystal growth
/wp:paragraph
wp:paragraph
Camera for before-and-after photos
/wp:paragraph
wp:paragraph
Labels for testing different jars
/wp:paragraph
wp:heading
Best 24-Hour Recipe
/wp:heading
wp:paragraph
A common classroom-style borax crystal recipe uses about 3 tablespoons of borax powder per cup of hot water. A public library crystal-growing guide gives the same 3 tablespoons per cup ratio for making a saturated borax solution.
/wp:paragraph
wp:paragraph
Use this as your starting point:
/wp:paragraph
wp:paragraph
1 cup hot water
/wp:paragraph
wp:paragraph
3 tablespoons borax powder
/wp:paragraph
wp:paragraph
1 pipe cleaner shape
/wp:paragraph
wp:paragraph
1 jar
/wp:paragraph
wp:paragraph
This ratio usually gives strong crystal growth overnight.
/wp:paragraph
wp:paragraph
If you want larger crystals, you can experiment with slightly more borax, but stop when no more dissolves easily. That is a sign the solution is becoming saturated.
/wp:paragraph
wp:heading
Step-by-Step Instructions
/wp:heading
wp:heading
Step 1: Shape the Pipe Cleaner
/wp:heading
wp:paragraph
Bend a pipe cleaner into a shape.
/wp:paragraph
wp:paragraph
Good beginner shapes include:
/wp:paragraph
wp:paragraph
Star
/wp:paragraph
wp:paragraph
Heart
/wp:paragraph
wp:paragraph
Circle
/wp:paragraph
wp:paragraph
Snowflake
/wp:paragraph
wp:paragraph
Initial letter
/wp:paragraph
wp:paragraph
Small spiral
/wp:paragraph
wp:paragraph
Simple tree shape
/wp:paragraph
wp:paragraph
The pipe cleaner gives crystals a rough surface where they can start growing. This is called a nucleation site. In the AACT classroom activity, the pipe cleaner serves as the place where crystallization begins as the supersaturated solution cools.
/wp:paragraph
wp:paragraph
Example: If you make a star shape, crystals will grow around the edges and points, creating a sparkling crystal star.
/wp:paragraph
wp:heading
Step 2: Tie the Shape to a Pencil or Stick
/wp:heading
wp:paragraph
Tie a piece of string to the pipe cleaner shape.
/wp:paragraph
wp:paragraph
Tie the other end of the string to a pencil, chopstick, or popsicle stick. The pencil will rest across the top of the jar, holding the shape inside the solution.
/wp:paragraph
wp:paragraph
Make sure the pipe cleaner shape hangs freely.
/wp:paragraph
wp:paragraph
It should not touch the bottom of the jar.
/wp:paragraph
wp:paragraph
It should not touch the sides of the jar.
/wp:paragraph
wp:paragraph
It should be fully covered by the solution.
/wp:paragraph
wp:paragraph
This matters because crystals grow better when the shape is suspended in the liquid.
/wp:paragraph
wp:heading
Step 3: Add Hot Water to the Jar
/wp:heading
wp:paragraph
Ask an adult to pour hot water into the jar.
/wp:paragraph
wp:paragraph
The water should be hot enough to dissolve borax well. Many classroom activities use boiling water, but children should not handle boiling water without adult help.
/wp:paragraph
wp:paragraph
Hot water is important because solids usually dissolve better in hotter water. When the water cools, it can no longer hold as much dissolved borax, so the extra borax begins forming crystals.
/wp:paragraph
wp:heading
Step 4: Stir in Borax
/wp:heading
wp:paragraph
Add borax powder one tablespoon at a time.
/wp:paragraph
wp:paragraph
Stir until it dissolves.
/wp:paragraph
wp:paragraph
Continue adding borax until the solution becomes saturated. A simple sign is that some borax starts collecting at the bottom and no longer dissolves easily.
/wp:paragraph
wp:paragraph
For a basic recipe, use about 3 tablespoons of borax per cup of hot water.
/wp:paragraph
wp:paragraph
Optional: add food coloring if you want colored crystals.
/wp:paragraph
wp:paragraph
Important: the color may not always be very strong. Food coloring colors the solution, but the crystals may still look clear or pale depending on concentration and lighting.
/wp:paragraph
wp:heading
Step 5: Lower the Pipe Cleaner Into the Solution
/wp:heading
wp:paragraph
Carefully place the pipe cleaner shape into the jar.
/wp:paragraph
wp:paragraph
Rest the pencil or stick across the top of the jar so the shape hangs in the solution.
/wp:paragraph
wp:paragraph
Make sure the shape is fully submerged.
/wp:paragraph
wp:paragraph
If it touches the bottom or sides, adjust the string.
/wp:paragraph
wp:heading
Step 6: Leave the Jar Undisturbed
/wp:heading
wp:paragraph
Place the jar somewhere safe where it will not be bumped.
/wp:paragraph
wp:paragraph
Let it sit overnight or up to 24 hours.
/wp:paragraph
wp:paragraph
This step is very important. Moving the jar can disturb the crystal growth.
/wp:paragraph
wp:paragraph
A popular borax crystal activity from Steve Spangler Science also recommends lowering the shape into a hot supersaturated solution and letting it sit undisturbed overnight.
/wp:paragraph
wp:paragraph
Example: Set the jar on a tray in a quiet corner of the kitchen or classroom. Do not stir it again after the pipe cleaner is inside.
/wp:paragraph
wp:heading
Step 7: Remove and Dry the Crystals
/wp:heading
wp:paragraph
After 8 to 24 hours, carefully lift the pipe cleaner out of the jar.
/wp:paragraph
wp:paragraph
You should see crystals attached to the pipe cleaner.
/wp:paragraph
wp:paragraph
Place it on a paper towel or hang it somewhere safe to dry.
/wp:paragraph
wp:paragraph
Do not eat the crystals. They are for observation and decoration only.
/wp:paragraph
wp:heading
What Should Happen After 24 Hours?
/wp:heading
wp:paragraph
After 24 hours, you should see a crust of crystals forming around the pipe cleaner.
/wp:paragraph
wp:paragraph
The crystals may look:
/wp:paragraph
wp:paragraph
Clear
/wp:paragraph
wp:paragraph
White
/wp:paragraph
wp:paragraph
Sparkly
/wp:paragraph
wp:paragraph
Frosty
/wp:paragraph
wp:paragraph
Glass-like
/wp:paragraph
wp:paragraph
Chunky
/wp:paragraph
wp:paragraph
Needle-like
/wp:paragraph
wp:paragraph
Clustered
/wp:paragraph
wp:paragraph
If you added food coloring, the crystals may have a light tint, but the color may be softer than expected.
/wp:paragraph
wp:paragraph
The best result usually appears when the solution is strong, hot, fully dissolved, and left undisturbed.
/wp:paragraph
wp:heading
The Science Behind the Experiment
/wp:heading
wp:paragraph
This experiment works because of solubility and crystallization.
/wp:paragraph
wp:paragraph
Solubility means how much of a substance can dissolve in a liquid.
/wp:paragraph
wp:paragraph
Hot water can dissolve more borax than cold water. When you add borax to hot water and keep stirring, the borax particles spread throughout the water.
/wp:paragraph
wp:paragraph
When no more borax can dissolve, the solution is saturated.
/wp:paragraph
wp:paragraph
If hot water holds more dissolved borax than it normally could at a cooler temperature, the solution becomes supersaturated as it cools.
/wp:paragraph
wp:paragraph
As the solution cools, the water cannot keep all that borax dissolved. The extra borax begins leaving the solution and attaching to the pipe cleaner. The particles arrange themselves into repeating crystal patterns.
/wp:paragraph
wp:paragraph
That is crystallization.
/wp:paragraph
wp:paragraph
The AACT activity summarizes the same process: students create a supersaturated borax solution with boiling water, then crystals form on the pipe cleaner as the solution cools and remains undisturbed overnight.
/wp:paragraph
wp:heading
What Is a Supersaturated Solution?
/wp:heading
wp:paragraph
A supersaturated solution contains more dissolved material than the liquid would normally hold at a lower temperature.
/wp:paragraph
wp:paragraph
This happens because hot water can dissolve more solid than cool water.
/wp:paragraph
wp:paragraph
Example:
/wp:paragraph
wp:paragraph
Imagine a classroom with 20 seats.
/wp:paragraph
wp:paragraph
At first, 20 students can sit comfortably.
/wp:paragraph
wp:paragraph
Then the room is “heated” and somehow makes space for 30 students.
/wp:paragraph
wp:paragraph
But when the room cools back to normal, there is no longer enough space for everyone.
/wp:paragraph
wp:paragraph
The extra students have to leave the seats.
/wp:paragraph
wp:paragraph
In this experiment, the “extra students” are borax particles. As the solution cools, the extra particles leave the water and attach to the pipe cleaner.
/wp:paragraph
wp:paragraph
That is how crystals begin growing.
/wp:paragraph
wp:heading
What Is a Crystal?
/wp:heading
wp:paragraph
A crystal is a solid material whose particles are arranged in a repeating pattern.
/wp:paragraph
wp:paragraph
Different substances form different crystal shapes because their particles arrange themselves differently.
/wp:paragraph
wp:paragraph
That is why table salt, sugar, snowflakes, quartz, and borax crystals do not all look exactly the same.
/wp:paragraph
wp:paragraph
In this experiment, the crystal shape depends on the borax particles and the conditions inside the jar.
/wp:paragraph
wp:heading
Why Do Crystals Grow on the Pipe Cleaner?
/wp:heading
wp:paragraph
Crystals need a place to start.
/wp:paragraph
wp:paragraph
The pipe cleaner provides a rough surface where tiny particles can attach. Once a few particles attach, more particles join them. Over time, a visible crystal cluster forms.
/wp:paragraph
wp:paragraph
This starting point is called nucleation.
/wp:paragraph
wp:paragraph
Smooth surfaces may not grow crystals as easily. Rough or fuzzy surfaces work better because they provide many tiny points where crystals can begin forming.
/wp:paragraph
wp:paragraph
Example: A pipe cleaner usually works better than a smooth plastic straw because the fuzzy fibers give the crystals more places to attach.
/wp:paragraph
wp:heading
Variables You Can Test
/wp:heading
wp:paragraph
This experiment becomes much more educational if you test one variable at a time.
/wp:paragraph
wp:paragraph
You can test:
/wp:paragraph
wp:paragraph
More borax vs less borax
/wp:paragraph
wp:paragraph
Hotter water vs cooler water
/wp:paragraph
wp:paragraph
Pipe cleaner vs string
/wp:paragraph
wp:paragraph
Food coloring vs no coloring
/wp:paragraph
wp:paragraph
Tall jar vs wide jar
/wp:paragraph
wp:paragraph
Still jar vs moved jar
/wp:paragraph
wp:paragraph
Different shapes
/wp:paragraph
wp:paragraph
Different cooling times
/wp:paragraph
wp:paragraph
Different waiting times
/wp:paragraph
wp:paragraph
Example experiment idea:
/wp:paragraph
wp:paragraph
Make three jars.
/wp:paragraph
wp:paragraph
Jar A: 1 tablespoon borax per cup of water
/wp:paragraph
wp:paragraph
Jar B: 2 tablespoons borax per cup of water
/wp:paragraph
wp:paragraph
Jar C: 3 tablespoons borax per cup of water
/wp:paragraph
wp:paragraph
Keep everything else the same.
/wp:paragraph
wp:paragraph
After 24 hours, compare which jar grew the most crystals.
/wp:paragraph
wp:paragraph
This turns the activity from a craft into a real science experiment.
/wp:paragraph
wp:heading
Observation Table for Students
/wp:heading
wp:paragraph
Use this simple table for classroom or home learning.
/wp:paragraph
wp:table
| Time | What You Observe | Notes |
|---|---|---|
| 0 hours | Pipe cleaner placed in solution | Solution is hot and clear/cloudy |
| 2 hours | First crystals may begin forming | Check without moving jar |
| 6 hours | More crystals visible | Growth may appear around edges |
| 12 hours | Stronger crystal clusters | Shape becomes clearer |
| 24 hours | Final crystal formation | Remove and dry carefully |
/wp:table
wp:heading
Troubleshooting: Why Did My Crystals Not Grow?
/wp:heading
wp:heading
Problem 1: Not Enough Borax
/wp:heading
wp:paragraph
If you did not add enough borax, the solution may not have been saturated.
/wp:paragraph
wp:paragraph
Fix: Add more borax next time until some stops dissolving.
/wp:paragraph
wp:heading
Problem 2: Water Was Not Hot Enough
/wp:heading
wp:paragraph
Cool water cannot dissolve as much borax.
/wp:paragraph
wp:paragraph
Fix: Use hotter water with adult help.
/wp:paragraph
wp:heading
Problem 3: The Jar Was Moved Too Much
/wp:heading
wp:paragraph
Movement can disturb early crystal growth.
/wp:paragraph
wp:paragraph
Fix: Leave the jar in a quiet place overnight.
/wp:paragraph
wp:heading
Problem 4: Pipe Cleaner Touched the Jar
/wp:heading
wp:paragraph
If the shape touches the bottom or sides, crystals may grow unevenly or stick to the jar.
/wp:paragraph
wp:paragraph
Fix: Suspend the shape in the center.
/wp:paragraph
wp:heading
Problem 5: Not Enough Time
/wp:heading
wp:paragraph
Some crystals appear within hours, but stronger growth may need overnight or a full 24 hours.
/wp:paragraph
wp:paragraph
Fix: Wait longer before removing the shape.
/wp:paragraph
wp:heading
Problem 6: Too Much Food Coloring
/wp:heading
wp:paragraph
Food coloring can make the solution look dramatic, but it does not always make crystals brighter.
/wp:paragraph
wp:paragraph
Fix: Use color lightly and focus on crystal formation.
/wp:paragraph
wp:heading
Can You Grow Crystals Without Borax?
/wp:heading
wp:paragraph
Yes, but the result may take longer.
/wp:paragraph
wp:paragraph
Alternative crystal materials include:
/wp:paragraph
wp:paragraph
Salt
/wp:paragraph
wp:paragraph
Sugar
/wp:paragraph
wp:paragraph
Epsom salt
/wp:paragraph
wp:paragraph
Alum
/wp:paragraph
wp:paragraph
Salt and sugar crystals are safer for food-related handling, but they often require more time, careful concentration, and patience. Rock candy, for example, can take several days to form large sugar crystals.
/wp:paragraph
wp:paragraph
For a 24-hour experiment with visible results, borax is usually faster and more reliable.
/wp:paragraph
wp:paragraph
However, if the experiment is for very young children, a salt or sugar version may be a better choice, even if the crystals are slower.
/wp:paragraph
wp:heading
Borax Crystals vs Salt Crystals vs Sugar Crystals
/wp:heading
wp:table
| Material | Speed | Safety Notes | Best Use |
|---|---|---|---|
| Borax | Fast, often overnight | Do not eat; adult supervision required | Quick visual crystal experiment |
| Salt | Slower | Safer household material, but do not eat experiment solution | Simple crystal observation |
| Sugar | Slower, often several days | Food-based if clean kitchen method is used | Rock candy-style experiment |
| Epsom salt | Can be fairly quick | Do not eat experiment crystals | Needle-like crystal activity |
| Alum | Good crystal growth | Do not eat; adult supervision recommended | Clear crystal-growing projects |
/wp:table
wp:heading
Example: Crystal Snowflake
/wp:heading
wp:paragraph
A crystal snowflake is one of the best beginner versions of this experiment.
/wp:paragraph
wp:paragraph
Bend a pipe cleaner into a snowflake shape.
/wp:paragraph
wp:paragraph
Make a borax solution.
/wp:paragraph
wp:paragraph
Suspend the snowflake in the jar.
/wp:paragraph
wp:paragraph
Leave it overnight.
/wp:paragraph
wp:paragraph
Remove it after crystals form.
/wp:paragraph
wp:paragraph
This works especially well because the snowflake has many arms and edges where crystals can attach.
/wp:paragraph
wp:paragraph
This is similar to the AACT winter crystals activity, where students make a snowflake from pipe cleaner and suspend it in a supersaturated borax solution overnight.
/wp:paragraph
wp:heading
Example: Crystal Heart
/wp:heading
wp:paragraph
A crystal heart is a good version for a classroom project, gift, or decoration.
/wp:paragraph
wp:paragraph
Bend a pipe cleaner into a heart shape.
/wp:paragraph
wp:paragraph
Use clear solution for white crystals.
/wp:paragraph
wp:paragraph
Use food coloring for a pink or red tint.
/wp:paragraph
wp:paragraph
Let it grow overnight.
/wp:paragraph
wp:paragraph
This version is easy and visually appealing.
/wp:paragraph
wp:heading
Example: Crystal Name Initial
/wp:heading
wp:paragraph
You can also bend a pipe cleaner into the first letter of your name.
/wp:paragraph
wp:paragraph
This makes the experiment more personal and fun.
/wp:paragraph
wp:paragraph
Example: A student named Sara can bend the pipe cleaner into an “S” shape and grow crystals around it.
/wp:paragraph
wp:paragraph
This is a good classroom idea because each student can make a different letter and compare results.
/wp:paragraph
wp:heading
What Students Learn From This Experiment
/wp:heading
wp:paragraph
This experiment teaches several science concepts:
/wp:paragraph
wp:paragraph
Solubility
/wp:paragraph
wp:paragraph
Saturation
/wp:paragraph
wp:paragraph
Supersaturation
/wp:paragraph
wp:paragraph
Crystallization
/wp:paragraph
wp:paragraph
Physical change
/wp:paragraph
wp:paragraph
Temperature effects
/wp:paragraph
wp:paragraph
Observation
/wp:paragraph
wp:paragraph
Variables
/wp:paragraph
wp:paragraph
Nucleation
/wp:paragraph
wp:paragraph
Scientific method
/wp:paragraph
wp:paragraph
The best part is that students can see the result.
/wp:paragraph
wp:paragraph
Instead of only memorizing a definition, they watch dissolved particles become visible crystals.
/wp:paragraph
wp:heading
Is This a Chemical Change or Physical Change?
/wp:heading
wp:paragraph
Growing borax crystals is mainly a physical change.
/wp:paragraph
wp:paragraph
The borax dissolves in water and then comes back out as crystals when the solution cools. The basic substance does not become a new chemical substance.
/wp:paragraph
wp:paragraph
This makes it a useful classroom example of dissolving, cooling, and crystallization.
/wp:paragraph
wp:paragraph
A physical change can still look dramatic. The solution changes from liquid with dissolved particles into visible solid crystals, but the material itself is not transformed into a new chemical compound.
/wp:paragraph
wp:heading
Why Temperature Matters
/wp:heading
wp:paragraph
Temperature controls how much borax can dissolve.
/wp:paragraph
wp:paragraph
Hot water can hold more borax.
/wp:paragraph
wp:paragraph
Cool water can hold less borax.
/wp:paragraph
wp:paragraph
When hot saturated solution cools, the extra borax has to come out of the solution.
/wp:paragraph
wp:paragraph
That is why crystals grow as the jar cools.
/wp:paragraph
wp:paragraph
Example: If you use lukewarm water instead of hot water, fewer crystals may form because less borax dissolves at the start.
/wp:paragraph
wp:heading
Why Patience Matters
/wp:heading
wp:paragraph
Crystal growth takes time.
/wp:paragraph
wp:paragraph
Tiny particles need time to attach, arrange, and grow into visible structures. If the jar is moved too often, the crystals may break, fall, or grow unevenly.
/wp:paragraph
wp:paragraph
For the best result, prepare the jar in the evening and check it the next morning.
/wp:paragraph
wp:paragraph
By 24 hours, the crystal shape is usually much more visible.
/wp:paragraph
wp:heading
How to Make the Experiment More Scientific
/wp:heading
wp:paragraph
To make this a real science project, ask a testable question.
/wp:paragraph
wp:paragraph
Examples:
/wp:paragraph
wp:paragraph
Does more borax create more crystals?
/wp:paragraph
wp:paragraph
Does food coloring affect crystal growth?
/wp:paragraph
wp:paragraph
Does a fuzzy pipe cleaner grow more crystals than string?
/wp:paragraph
wp:paragraph
Does slow cooling create larger crystals?
/wp:paragraph
wp:paragraph
Does jar size affect crystal growth?
/wp:paragraph
wp:paragraph
Then create a hypothesis.
/wp:paragraph
wp:paragraph
Example:
/wp:paragraph
wp:paragraph
“If I add more borax to the solution, then more crystals will grow because the solution will contain more dissolved material.”
/wp:paragraph
wp:paragraph
Next, test only one variable at a time.
/wp:paragraph
wp:paragraph
Record observations.
/wp:paragraph
wp:paragraph
Take photos.
/wp:paragraph
wp:paragraph
Compare results.
/wp:paragraph
wp:paragraph
Write a conclusion.
/wp:paragraph
wp:paragraph
This turns a simple activity into a proper STEM project.
/wp:paragraph
wp:heading
Safety Tips for Parents and Teachers
/wp:heading
wp:paragraph
Use hot water only with adult supervision.
/wp:paragraph
wp:paragraph
Do not let children handle boiling water.
/wp:paragraph
wp:paragraph
Keep borax away from mouths, eyes, pets, and small children.
/wp:paragraph
wp:paragraph
Use labeled containers.
/wp:paragraph
wp:paragraph
Do not use experiment containers for food afterward.
/wp:paragraph
wp:paragraph
Wash hands after handling materials.
/wp:paragraph
wp:paragraph
Keep the experiment on a tray to prevent spills.
/wp:paragraph
wp:paragraph
Dispose of leftover liquid safely.
/wp:paragraph
wp:paragraph
Store finished crystals away from young children.
/wp:paragraph
wp:paragraph
Borax and related borate products should be used according to product instructions, and ingestion should be treated seriously. Poison Control specifically advises seeking immediate medical attention if someone ingests a borate.
/wp:paragraph
wp:heading
What People Often Get Wrong
/wp:heading
wp:paragraph
Many people think crystals grow because the water “turns into crystals.” That is not correct. The crystals come from the dissolved borax, not from the water itself.
/wp:paragraph
wp:paragraph
Another mistake is thinking more food coloring automatically means brighter crystals. The color may stay mostly in the liquid, so the crystals can still look pale.
/wp:paragraph
wp:paragraph
A third mistake is stirring the jar after the pipe cleaner is inside. This can disturb crystal growth.
/wp:paragraph
wp:paragraph
A fourth mistake is removing the crystals too early. Small crystals may start forming within hours, but a full overnight wait usually gives better results.
/wp:paragraph
wp:paragraph
A fifth mistake is treating borax like food because it is used in household activities. Borax is not food and should never be eaten.
/wp:paragraph
wp:heading
Practical Reader Takeaway
/wp:heading
wp:paragraph
Growing crystals in 24 hours is a simple experiment that teaches real chemistry.
/wp:paragraph
wp:paragraph
The main idea is supersaturation. Hot water dissolves more borax than cool water. When the solution cools, the extra borax comes out of the water and forms crystals on the pipe cleaner.
/wp:paragraph
wp:paragraph
The experiment is fun because the result looks beautiful, but it is also educational because it shows solubility, cooling, crystallization, and observation in action.
/wp:paragraph
wp:paragraph
With adult supervision and proper safety, it can be a strong home or classroom STEM activity.
/wp:paragraph
wp:heading
Frequently Asked Questions
/wp:heading
wp:heading
Can you really grow crystals in 24 hours?
/wp:heading
wp:paragraph
Yes. Borax crystals can often grow overnight or within 24 hours when you use a hot supersaturated solution and leave the jar undisturbed. The AACT classroom activity describes borax crystallization forming on a pipe cleaner as the solution cools overnight.
/wp:paragraph
wp:heading
What is the best material for growing crystals quickly?
/wp:heading
wp:paragraph
Borax is one of the easiest materials for fast visible crystals. Salt and sugar can also grow crystals, but they usually take longer.
/wp:paragraph
wp:heading
Is borax safe for kids?
/wp:heading
wp:paragraph
Borax should only be used with adult supervision. It should not be eaten, tasted, inhaled, or handled carelessly. Poison Control advises following product instructions and seeking medical attention if borates are ingested.
/wp:paragraph
wp:heading
Why do crystals grow on pipe cleaners?
/wp:heading
wp:paragraph
Pipe cleaners have rough fuzzy surfaces that give dissolved particles places to attach. These starting points help crystals form and grow.
/wp:paragraph
wp:heading
Why does hot water work better?
/wp:heading
wp:paragraph
Hot water dissolves more borax. As the water cools, the extra dissolved borax leaves the solution and forms crystals.
/wp:paragraph
wp:heading
Can I use sugar instead of borax?
/wp:heading
wp:paragraph
Yes, sugar can form crystals, but it usually takes longer than 24 hours. Sugar crystals are commonly used in rock candy experiments.
/wp:paragraph
wp:heading
Can I use salt instead of borax?
/wp:heading
wp:paragraph
Yes, salt can form crystals, but salt crystals may take longer and may not look as dramatic as borax crystals.
/wp:paragraph
wp:heading
Why did my crystals grow at the bottom of the jar?
/wp:heading
wp:paragraph
This can happen if extra borax settled at the bottom or if the pipe cleaner touched the jar. Next time, suspend the shape in the middle and make sure the borax dissolves well.
/wp:paragraph
wp:heading
Can I touch the finished crystals?
/wp:heading
wp:paragraph
You can handle them gently after they dry, but wash your hands afterward and keep them away from young children and pets. Do not eat them.
/wp:paragraph
wp:heading
Can I keep the crystals as decoration?
/wp:heading
wp:paragraph
Yes, dried borax crystal shapes can be kept as decorations, but they should be handled carefully and kept away from moisture, food areas, pets, and small children.
/wp:paragraph
wp:heading
Conclusion
/wp:heading
wp:paragraph
Growing your own crystals in 24 hours is one of the best beginner science experiments because it is simple, visual, and full of real chemistry.
/wp:paragraph
wp:paragraph
With hot water, borax, a pipe cleaner, and patience, you can watch a clear solution turn into sparkling crystal structures overnight. The process teaches solubility, supersaturation, nucleation, cooling, and crystallization in a way that students can actually see.
/wp:paragraph
wp:paragraph
The experiment also shows an important lesson about science: beautiful results often come from simple principles. A jar of hot solution may not look exciting at first, but inside it, tiny particles are moving, cooling, attaching, and arranging themselves into crystal patterns.
/wp:paragraph
wp:paragraph
That is what makes this experiment so useful. It is fun enough for a home activity, clear enough for a classroom demonstration, and scientific enough to become a real STEM project.
/wp:paragraph
wp:paragraph
Just remember the key rule: enjoy the crystals, observe the science, and always follow safety guidelines.
/wp:paragraph
wp:heading
Sources and Further Reading
/wp:heading
wp:paragraph
American Association of Chemistry Teachers: Winter Crystals
https://teachchemistry.org/classroom-resources/winter-crystals
/wp:paragraph
wp:paragraph
Poison Control: Borates, Borax, and Boric Acid Safety
https://www.poison.org/articles/borates
/wp:paragraph
wp:paragraph
Poison Control: Emergency Poison Help
https://www.poison.org/
/wp:paragraph
wp:paragraph
Attleboro Library: Growing Crystals Two Ways Using Supersaturated Solutions
https://attleborolibrary.org/wp-content/uploads/2020/11/Growing-Crystals.pdf
/wp:paragraph
wp:paragraph
Steve Spangler Science: Borax Crystal Ornaments
https://stevespangler.com/experiments/magic-crystal-snowflake/
/wp:paragraph